- Description
-
Details


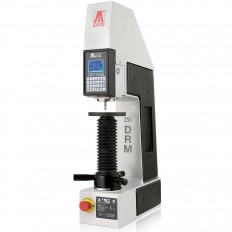
ONE BUTTON MEASUREMENT
Just press one button and the hardness tester's head moves down to make contact with the sample's surface, locking it. The hardness test cycle will automatically begin in automatic succession without breaching a phase. Within seconds results appear.CLOSED LOOP TECHNOLOGY (PAT. AFFRI)
Load forces are applied through load cells and controlled in "Closed Loop" with a frequency of 1 khz, assuring perfect linearity in every range. Results are not affected by any structural deflection, misalignment or vibration.

REPEATABILITY&REPRODUCIBILITY
When testing unstable samples or deflective parts, the AFFRI System will follow the sample without losing contact. Accurate measurements even on the first test will eliminate the need for repeated tests. The R&R data is at the top of its class.MOTORIZED TESTING HEAD
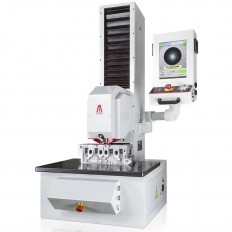
Automatic movement with automatic stop when contact is made with samples. Total of 300 mm of motorized vertical stroke. The approach of the head moving to the piece as opposed to the piece moving to the head allows for more accurate, stable and safe measurements.

LARGE BASE
The hardness tester’s wide work table base is capable of bearing masses beyond 1000 kg which allows for steady hardness measurements on bulky or irregular pieces. It also offers a comfortable working base for small pieces.COMPACT TESTING HAED
The measuring head of the DAKOMASTER 300 hardness tester is small and compact. It can easily test inside tubes with a diameter of 150 mm and above.DAKOMASTER SOFTWARE
The pre-installed software controls the whole instrument during the entire cycle avoiding operator errors:
This software is user friendly in and easily managed by touchscreen. The software, developed by the AFFRI team, is a powerful analysis system, including fast test settings, statistics of results, live graphs and the ability to store data or test sessions.
TECHNICAL SPECIFICATION
MODELDAKOMASTER 300
StandardEN-ISO 6506-2 / 6507-2 / EN-ISO 6508-2 / EN-ISO 2039 / ISO 868 / ASTM-E18 / ASTM E-10 / ASTM E-384 / ASTM 2240 / JIS
X-Y Table390x295 mm
Vertical head stroke300 mm Motorized
Depth capacity130 mm
Preload29.4 - 98.1 N (3 - 10 kgf) Force range
Rockwell: 588.4 - 980.7 - 1471 N (60 - 100 - 150 kgf)
Superficial Rockwell: 29.42 - 147.1 - 294.2 - 441.3 N (3 - 15 - 30 - 45 kgf)
Brinell: 9.807 - 49.03 - 61.29 - 98.07 - 153.2 - 245.2 - 294.2 - 306.5 - 612.9 - 1226 - 1839 N (On request 2452 N)
(1 - 5 - 6.25 - 10 - 15.6 - 25 - 30 - 31.2 - 62.5 - 125 - 187.5 kgf - On request 250 kgf)
Vickers - Knoop: 9.807 - 29.42 - 49.03 - 98.07 - 147.1 - 196 - 294.2 - 490.35 - 980.7 N (1 - 3 - 5 - 10 - 15 - 20 - 30 - 50 - 100 kgf)
Optional tests: 49 - 132 - 358 - 961 N (For plastics and rubbers as per EN-ISO 2039 std)Feasible tests
Rockwell: HRA - HRB - HRC - HRD - HRE - HRF - HRG - HRH - HRK - HRL - HRM - HRP - HRR - HRS - HRV
Superficial Rockwell: HR15N - HR30N - HR45N - HR15T - HR30T - HR45T - HR15W - HR30W - HR45W - HR15X - HR30X HR45X - HR15Y - HR30Y - HR45Y
Brinell HBWT: HB1/10 - HB1/30- HB2.5/6.25 - HB2.5/15.625 - HB2.5/31.25 - HB2.5/62.5 - HB2.5/187.5 - HB5/25 - HB5/125 - HB5/250
Vickers (Only indentation): HV1 - HV3 - HV5 - HV10 - HV15 - HV20 - HV30 - HV50 - HV100
Load accuracyBetter than 0,5 % - Reviews
-
Feature


