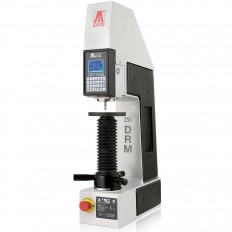
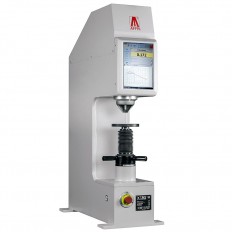
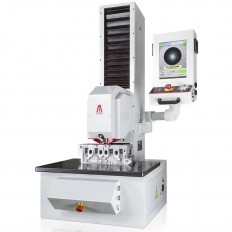
- Description
-
Details


CLOSED LOOP TECHNOLOGY (PAT. AFFRI)
Load forces are applied through load cells and controlled in "Closed Loop" with a frequency of 1 khz, assuring perfect linearity in every range. Results are not affected by any structural deflection, misalignment or vibration.REPEATABILITY AND REPRODUCIBILITY (R&R)
Accurate measurements on the first test, even in extreme conditions, eliminate the need for repeated tests. The R&R data is at the top of its class.

ONE BUTTON MEASUREMENT
Just press one button and the hardness tester's head moves down to make contact with the sample's surface, locking it. The hardness test cycle will automatically begin in automatic succession without breaching a phase. Within seconds results appear.INDENTER STROKE
When testing unstable samples or deflecting parts, the AFFRI System will follow the sample without losing contact thanks to its 50 mm stroke for indenter and clamping hood. Easy and fast hardness measurements on pieces with different thicknesses without acting on tester head or elevating screw.

MOTORIZED HEAD
Automatic movement with automatic stop when contact is made with samples. Total of 700 mm of motorized vertical stroke. The approach of the head moving to the piece as opposed to the piece moving to the head allows for more accurate, stable and safe measurements.CLAMPING SYSTEM (PAT. AFFRI)
Secure contact with the specimen is always maintained, even in the unlikely event of any specimen movement during the operation cycle. The clamping system assures perfect stability of any test piece throughout the test cycle, even if it's oiled, rusty or dirty.

LARGE BASE
The 3332 MRS’s wide work table base is capable of bearing masses beyond 1000 kg which allows for steady hardness measurements on bulky or irregular pieces. It also offers a comfortable working base for small pieces.L.I.S.A - LASER INDICATOR SYSTEM (PAT. AFFRI)
Exclusive application which allows ultra-precise test positioning. The laser pointing system helps to define the indentation area before the contact between the indenter and the specimen. Reach extreme points with lack of illumination, edges of gear’s teeth or sides of cutting tools and blades. (This application is optional)

SOFTWARE
The pre-installed software controls the whole instrument during the entire cycle avoiding operator errors. Powerful analysis system with easy and fast test settings, live statistics and graph. Data and test sessions storage.TOUCHSCREEN AND STATISTIC SOFTWARE
PC Series is a special model which integrate a large LCD multicolour touch panel and a powerful tablet PC with Windows® operative system.
The user-friendly software is designed with easy setting parameters for measurement setup, statistics and data storage. Hardness scales can be quickly selected from large and clear tabs. Conversion scales, correction for round samples and calibration off-set are always visible. Results are divided according to tolerances and can be viewed in three different types of graphs.
Setup customized personal test cycles. Different operators can select their own program finding the software as they left it.TECHNICAL SPECIFICATION
MODEL250 MRS 3332 MRS 3332 MRSA 3302 MRSA
StandardsEN-ISO 6506-2 / EN-ISO 6507-2 / EN-ISO 6508-2 / EN-ISO 2039 / EN-ISO 868 / ASTM E-18 E-10 / ASTM E-384 / ASTM E-2240 / JIS
X-Y Table---- 270x380 mm 330x390 mm
Indenter and clamping-hood stroke0/50 mm
Vertical head stroke---- 0/380 mm 0/500 mm motorized (On request 0/700 mm)
Elevating screw stroke0/215 mm ----
Depth capacity190 mm 200 mm
Preload29.4 - 98.1 N (3 - 10 kgf) Force range
Rockwell: 588.4 - 980.7 - 1471 N (60 - 100 - 150 kgf)
Superficial Rockwell: 29.42 - 147.1 - 294.2 - 441.3 N (3 - 15 - 30 - 45 kgf)
Brinell: 49.03 - 61.29 - 98.07 - 153.2 - 245.2 - 294.2 - 306.5 - 612.9 - 1226 - 1839 N (On request 2452 N)
(5 - 6.25 - 10 - 15.6 - 25 - 30 - 31.2 - 62.5 - 125 - 187.5 kgf - On request 250 kgf)
Vickers - Knoop: 9.807 - 29.42 - 49.03 - 98.07 - 147.1 - 196 - 294.2 - 490.35 - 980.7 N (1 - 3 - 5 - 10 - 15 - 20 - 30 - 50 - 100 kgf)
Optional tests: 49 - 132 - 358 - 961 N (For plastics and rubbers as per EN-ISO 2039)
Feasible tests
Rockwell: HRA - HRB - HRC - HRD - HRE - HRF - HRG - HRH - HRK - HRL - HRM - HRP - HRR - HRS - HRV
Superficial Rockwell: HR15N - HR30N - HR45N - HR15T - HR30T - HR45T - HR15S - HR30S - HR45S - HR15W - HR30W - HR45W - HR15X - HR30X - HR45X - HR15Y - HR30Y - HR45Y
Brinell HBWT: 1/30 - 2.5/15.6 - 2.5/31.5 - 5/125(3) (Aluminum and its alloys) - 2.5/62.5(2) (Aluminum and its alloys) - 2.5/187.5(6) (Aluminum and its alloys) - 2.5/187.5(5) (Carbon steel) - 2.5/187.5(1) (Cast iron)
Vickers - Knoop (Only indentation): HV1 - HV3 - HV5 - HV10 - HV15 - HV20 - HV30 - HV50 - HV100
Shore: A - D (Optional)
CHD: (Optional)
Load accuracyBetter than 0.5 % - Reviews
-
Feature


