- Description
-
Details


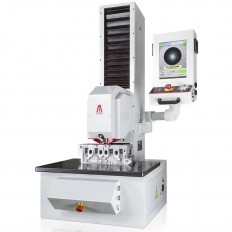
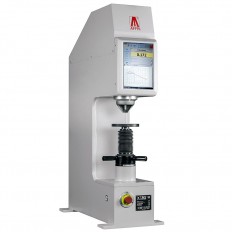
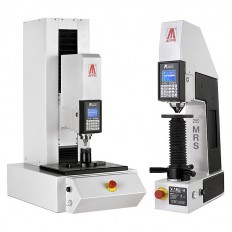
ONE BUTTON HARDNESS MEASUREMENT
The hardness tester measuring head moves down until contact is made, applies the force and make the indentation. The software will move to the camera view mode where the indent is automatically measured..CLOSED LOOP TECHNOLOGY (PAT. AFFRI)
Load forces are applied through load cells and controlled in "Closed Loop" with a frequency of 1 khz, assuring perfect linearity in every range. Results are not affected by any structural deflection, misalignment or vibration.

MOTORIZED INDENTER STROKE
Automatic movements with automatic loading when contact is made. The approach of the head to the sample and not the opposite allows more accurate, scable and safe measurements.PROTECTED DIAMOND INDENTER
The Affri diamond indenter has a life-span longer tanks to the special protective cup. The indenter retracts and moves down just after the test piece is clamped thereby minimizing the risk to accidental shock.

CLAMPING SYSTEM (PAT. AFFRI)
Secure contact with the specimen is always mantained, even in the unlikely event of any specimen movement during the operation cycle. The clamping system assures perfect stability of any test piece throughout the test cycle.MOTORIZED TURRET (INDENTER/OBJECTIVE)
One slot for an indenter and one slot for an objective. Auto-rotating and auto-tool-switching for a complete automatic measurement cycle.THE TOUCHSCREEN AND THE SOFTWARE
The preinstalled software controls the whole instrument avoiding setting errors or operators mistakes:
Powerful software for test cycle managing and automatic indent reading. Wide settings parameters for measurement setup, image adjustments, statistics and data storage.
AUTOMATIC VICKERS AND BRINELL READING
AUTOMATIC ROCKWELL AND BRINELL HBWT READING
AUTOMATIC CHD WITH NON-DESTRUCTIVE METHOD (OPTIONAL)
Wide touchscreen for easy test planning and a clear view of results.
User friendly Windows® interface. Set the hardness test scales, the properties of the camera and the test method settings.
Choose result conversion in any other hardness scale. Use offset and round correction values for tests on convex cylindrical surfaces or various diameters. Manage the instrument tools and check if the installed tool is correct for the selected hardness test method. Statistics charts and custom reports can be generated at a touch of a button.
All results and testing sessions can be stored on the large archive using the on-board software database.


TECHNICAL FEATURE
MODELLD3000AXStandards
EN-ISO 6506 / EN-ISO 6507 / EN-ISO 6508 / EN-ISO 2039 / EN-ISO 7619 / EN-ISO 868 / ASTM E-103 / ASTM E-18 / ASTM E-10 / ASTM E-384
Height capacity200 - 240 mm / 7.8 - 9.4” (More on request)
Indenter and clamping hood strokeMotorized 20 mm / 0.8”
Depth capacity190 mm / 7.4”Reading
Focus: automatic and manual - Reading: automatic and manual
Preload29.4 - 98.1 N (3 - 10 kgf)Test loads
LD3000 AX (variant 250) from 1 to 250 kgf (From 9,807 to 2452 N)
LD3000 AX (variant 3000) from 3 to 3000 kgf (From 29.4 to 29421 N)
Vickers - Knoop: 9.807 - 19.60 - 29.42 - 49.03 - 98.07 - 196 - 294.2 - 490.35 - 980.7 N (1 - 2 - 3 - 5 - 10 - 20 - 30 - 50 - 100 kgf)
Brinell: 9.807 - 24.52 - 49.03 - 61.29 - 98.07 - 153.2 - 245.2 - 294.2 - 306.5 - 612.9 - 1226 - 1839 - 2452 - 4903 - 7355 - 9870 - 29421 N)
(1 - 2.5 - 5 - 6.25 - 10 - 15.6 - 25 - 30 - 31.2 - 62.5 - 125 - 187.5 kgf - 250 - 500 - 750 - 1000 - 3000 kgf)
Rockwell: 588.4 - 980.7 - 1471 N (60 - 100 - 150 kgf)
Superficial Rockwell: 147.1 - 294.2 - 441.3 N (15 - 30 - 45 kgf)Feasible tests
Rockwell: HRC - HRA - HRD - HRB - HRF - HRG - HRL - HRM - HRR
Superficial Rockwell: HRN - HRT
Brinell HBW (Depending on the models): HBW1/30 - HBW2.5/15.625 - HBW2.5/31.25 - HBW2.5/62.5 - HBW2.5/187.5 - HBW5/25 - HRW5/62.5 - HBW5/125 - HBW5/250 - HBW5/750 - HBW10/100 - HBW10/250 - HBW10/500 - HBW10/1000 - HBW10/1500 - HBW10/3000
Brinell HBWT (Depending on the models): HBT 2.5/62.5 - HBT 2.5/187.5 - HBT 5/125 - HBWT5/250 - HBWT5/750 - HBWT10/500 - HBWT10/1000 - HBWT10/1500 - HBWT10/3000
Vickers (Depending on the models): HV1 - HV2 - HV3 - HV5 - HV10 - HV20 - HV30 - HV50 - HV100
Load accuracyBetter than 0.05 % - Reviews
-
Feature


